Faux leather materials are low maintenance products unlike leather. They do not fade, crack,
become stiff and are usually stain-free. Also, as artificial leather is man-made leather; they are
available in range of colors and shades. If one wants to have a uniform look, artificial leather is the
best option. All the pieces of a certain product made from artificial leather will look the same which
is not the case with genuine leather.
Faux leather is better than real leather when it comes to manufacturing an item. It is easy to cut
and sew faux leather and the stitching is seamless. As faux leather is easy to work with, variety of
items can made from it. Moreover, using artificial leather is the best way to support animal rights
and avoid environmental impacts. It has become imperative to raise the voice against the atrocities
done to innocent animals in the name of leather. Every individual has the responsibility to educate
other people about animal cruelty and discourage using leather products. Creating awareness
about artificial leather will help to solve the environmental issues and protect animals from cruelty.
To gift a safe and sustainable environment to the next generation, one must start using eco-friendly
and cruelty free leather.
Based from the above statement, student tasked to interpret an individual message as well as
creating a story interpretation through one cohesive high-end-RTW collection consists of
3 looks. You are required to interpret in your original design and a cause you would like to
champion based on any specific subject matter interpretation that may influence the fashion
industry and trend.
MY STORY:
In this collection, I have really tried hard to enhance it on the strength one holds, not only a woman but as a human being in general. My design is based on the movie Avatar a 2009 film marketed as Jamnes Cameron's Avatar which revolves around the male lead, Jake Sully, but I would like to focus on the female lead, Neythiri. In the movie, it shows that Neythiri stands her ground and defends her home no matter what challenges they face. This really takes a dip into women empowerment and equality. Not only men but both men and women can defend for their rights as long as they know what they stand for. I really wanted to portray that in my design, giving off a warrior look and a confident individual. In this design, I wanted to merge the Pandoran atmosphere with my looks as it is a crucial part of the movie especially the stunning scenery.
Especially since we are using faux leather, it really helps to bring out the chic and boldness of a design better than any other fabric.
LOOK 1
In this design, I'm doing an overlay panel jacket paired up with a simple princess line top and a skirt.
I decided to start off with my base as it was an easy start and I could smooth out the process later on. There were a few complication as my design had a high neck.
During Ms. Melina's class, she helped me to draft out a princess line bodice with a high neck. It didn't turn out well as the fit of the top was off and that affected how it looked on the dummy.
This is how the drafted top looked with a high neck. I wasn't satisfied with the outcome and consulted with Mr. JR. We had decided to go with the basic neck and carry on with the design.
This is the outcome of a basic neck princess line top that I had drafted. The fit was right, so I decided to use it for the design.
Without wasting any time, I cut out the lining for my base with a 1.5cm allowance and sewed it.
Matching up the knotches and sewing with a 1.5cm allowance. After sewing, I had ironed open all the seams.
Cutting out the faux leather of the same measurements and sewing it to the lining.
Started sewing the lining from the neckline then worked my way down.
To open up the seam, I sewed 0.5cm on both sides of the seam to create a neat look.
After finishing the top, I moved on to the skirt. By using the skirt block we had traced the last sem, I modified it to create a princess line skirt.
After cutting out the lining for the skirt with a 1.5cm allowance I pinned the darts and started sewing it.
Cutting out the skirt pattern on faux leather and sewing it together with the lining. It was quite challenging to attach the lining as it was my first time using faux leather. We had to use a plastic footer which ensured a smoother process.
attaching the zip:
I had started to work on my panel jacket as it is the main piece of my design, I was very picky on how I wanted it to look and how can I incorporate the Pandoran atmosphere into the design. It was a rough start as I was contemplating on the fabrics that I wanted to use as my borders. So, I decided to head on first with the faux leather bit which is my manipulation. For that, I cut out 3 panels of white faux leather measuring 10cm wide and 200cm in length.
Marked a 1cm allowance on each end of the leather.
Then, by using the fold and tuck method, I sewed a straight line with double thread along the leather.
After much discussion with Mr.JR, I had decided to go with a printed fabric as my borders as it was best suited for my design. It brought out the flora and fauna of avatar. I am really satisfied with the decision.
As the fabric was chiffon, it was not suitable to be sewn directly on faux leather, so, I decided to attach the printed fabric with of black lining and paper interfacing. This really helped to make the fabric sturdier and easier to sew onto faux leather.
I cut out 6 pieces of the combination of printed fabric, paper interfacing and black lining with measurements of 4cm wide and 200cm in length.
I had decided to add white lining to finish up the look. With white lining, it helps bring out a more elegant look to the design and black would wash it out as my base was already black.
Attaching cream lining with organza.
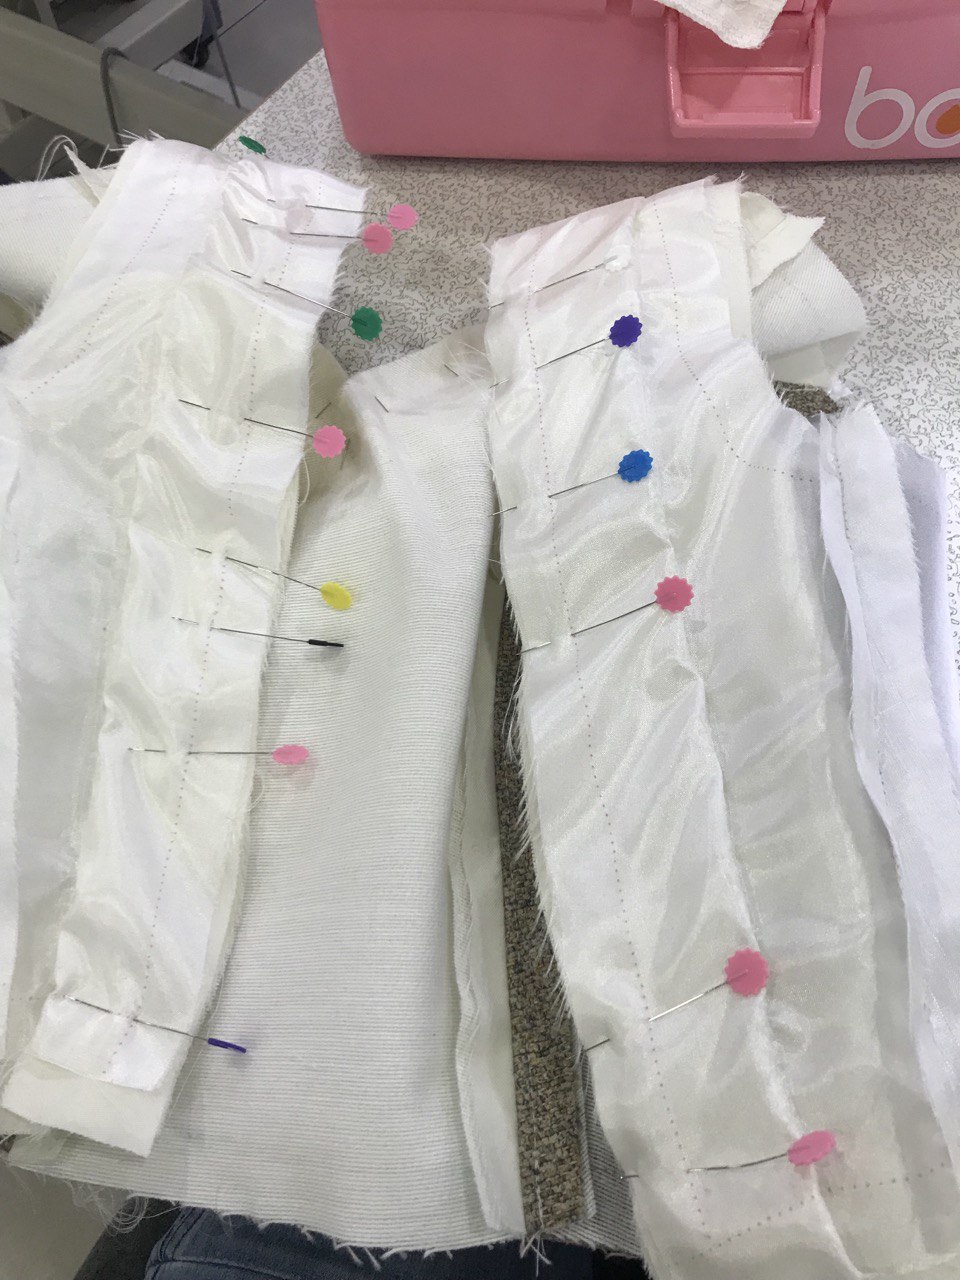
After sewing the lining, I pinned the panels onto the dummy and hand sewed it at certain places. By leaving some gap and sewing, it helped to create a 3D design.
marking the parts that I want to sew with a pin
Sewing the panels together.
ALMOST TOWARDS THE END:
Before adding finishing touches.
We had a fitting with our models, and I had to make a few adjustments to the design.
1. The skirt length was short, so I was advised to add at least 12cm extended at the bottom.
2. finishing up the back with lace instead of a zip as it fits the model better.
FINISHING THE BASE:
For the loops, I used cotton bias tape. I cut out 8 pieces of 7cm in length cotton bias tape. Then sewed it to make a loop.
Finishing up the top : I had pinned the looped bias tape on the faux leather and lining then sewed it close to create a seamless look.
After that, I added 15cm additional to the skirt to make it longer as requested by the model. AFter making all the adjustments, I sewed in the hem of the top and skirt and this is the final outcome of the design.
THATS A WRAP FOR LOOK 1.
LOOK 2
TOP:
Started look 2 with the top. I had decided to modify the look abit as there was a few complications in the design. I was unable to draft a one shoulder top, so, I decided to go with a cropped princess line top with a strapped back. I was really disappointed as I wanted to face the challenge but time was running out and that left me with no choice but to take an easier way out.
To start, I cut out the faux leather pieces for the cropped princess line top with a 1.5cm allowance followed by the cotton lining.
^faux leather
^ cotton lining
Ironing open the seams for the lining.
After learning from my mistakes in Look 1, I paid attention to detail on my Look 2.
^before opening the seams
^ after opening the seams
Starter sewing the lining onto the faux leather.
Pinning the lining to the leather with a dine needle. Besides that, I had also attached the loops the same way as I did for Look 1.
Started to cut out my manipulation for look 2 and 3 at the same time.
I cut out 2 panels of faux leather in cream with measurement of 10cm wide and 200cm in length.
I had then done the fold and tuck method that I used for my manipulation in Look 1.
Completing the borders of the manipulation by adding the printed fabric the same method as Look 1.
Cutting up panels of printed fabric, paper interfacing and black lining.
Attaching it to the manipulation.
Then I attached it to black lining as the base.
DRAPING THE SKIRT.
As time was running out, I had to drape my skirt and finish it off as fast as possible for the final presentation. I had used turquoise blue cotton voile as the base of my skirt. I cut out 2 separate 1m x 1m of the fabric and draped it diagonally (cross grain) on the mannequin so that the fall would be flowy. I had pinned up a few sections and sewed it to complete the look. And as the wasist band, I made a belt with printed fabric, black lining and paper interfacing (to make it sturdy).
FINAL PRODUCT:
Draped a V-neck princess armhole bodice with paper interfaacing then traced onto the mahjong paper. I had to extend 5cm to the top.
Transferred the design onto mahjong paper with an allowance of 1.5cm allowance.
Doing a test fit first with white cotton to see the fit on the mannequin.
As the fit seemed good, I decided to continue with the actual fabric.
Fabric used: cream cotton poplin with yuki cloth.
Marking the notches of the curve and pinning the fabric carefully to create a clean look.
I had cut out lining and facing (for the neckline and the back).
^ Pinning the curves to the notches on the lining
^ cutting out the facing
Attaching the facing to the lining. This was a little tricky as I had to make slits around the V-neck so that when it turns, it is shaped as a V.
After touching up the neckline, I started to attach the lining to the base.
I started with the neckline down the back of the top as I had to attack the loops again for a strapped back.
Attaching the lining was a little tricky as the lining was quite fragile and slippery.
Started to cut out my manipulation for look 2 and 3 at the same time.
I cut out 2 panels of faux leather in cream with measurement of 10cm wide and 200cm in length.
I had then done the fold and tuck method that I used for my manipulation in Look 1.
Sewing in the printed fabric around the princess armhole line to complete the look.^
Completing the borders of the manipulation by adding the printed fabric the same method as Look 1.
Cutting up panels of printed fabric, paper interfacing and black lining.
Attaching it to the manipulation.
Then I attached it to black lining as the base.
PANELED SKIRT:
For the skirt, I wanted to go for something that would go really well with the theme. So, I decided to sew on a panel skirt.
Firstly, I cut out panels of leather in cream, white and turquoise blue with the width of 7cm and various length. Then, I laid it out to overlay one another slightly at the top. To attach them together, I sewed a black waist band which completed the look. Finishing up the waistband with a hook to secure it.
Pinning it onto the dummy to finalize how I want each panel to lay out.
Also manipulating certain panels of the leather to make it look cohesive to the top.
FINAL OUTCOME OF LOOK 3:
FINAL OUTCOME OF ALL 3 LOOKS
LOOK 1
Back
LOOK 2
Front
Back
----- THE END ----
.jpg)


.jpeg)
.jpeg)


.jpeg)


.jpeg)


.jpeg)
.jpeg)

.jpeg)
.jpeg)
.jpeg)

.jpeg)
.jpeg)

.jpeg)
.jpeg)
.jpeg)

.jpeg)
.jpeg)
.jpeg)

.jpeg)
.jpeg)


.jpeg)


.jpeg)
.jpeg)

.jpeg)
.jpeg)
.jpeg)
.jpeg)
.jpeg)
.jpeg)
.jpeg)


.jpeg)
.jpeg)
.jpeg)
.jpeg)


.jpeg)
.jpeg)
.jpeg)

.jpeg)

.jpeg)
.jpeg)
.jpeg)

.jpeg)
.jpeg)
.jpeg)
.jpeg)

.jpeg)
.jpeg)

.jpeg)
.jpeg)


.jpeg)
.jpeg)
.jpeg)
.jpeg)
.jpeg)


.jpeg)
.jpeg)

.jpeg)
.jpeg)


Comments
Post a Comment